Posted 27 October 2018
I recently underwent rotator cuff repair surgery on my left (dominant) shoulder, and am now starting the rehab process. My PT person was adamant that I not re-start my normal rowing routine for at least six weeks post-op, due to the possibility that I could re-tear the tendon. This made me curious as to what the tension really was on my arms when rowing, so I decided to try and build a digital dynamic tension sensor, capable of plotting rowing strap tension in real time.
To start, I had to educate myself on the world of strain gauges and load cells, and what the differences are. As I came to understand, what I wanted was a load cell configured for tension measurement, with a strain gauge as the active sensing element in the load cell. So, I started searching for load cells, and was immediately inundated with ‘too much information’. This deluge is certainly better than the old days where I had to search through paper (really, no internet!) magazines and catalogs, but at least you didn’t have to worry about overload headaches! ;-).
Anyway, I found this item ‘Degraw 40Kg Tension Load Cell and HX711 Combo Pack Kit‘, as shown in the screenshot below
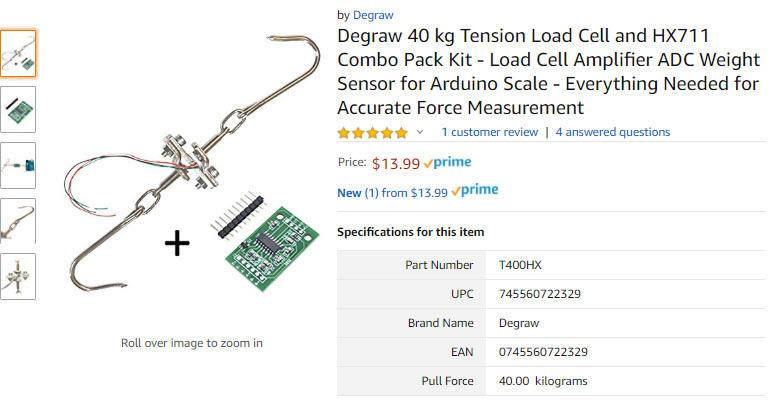
Amazon catalog item for Degraw load cell
This looked perfect for my intended use, as I could hook one end onto my rowing machine strap, and connect some sort of handle to the other end. Now all I had to do was figure out how to hook the thing up and get it to work. Fortunately Degraw also provided a sketch of the hookup using an Arduino Uno, so that part was pretty easy.
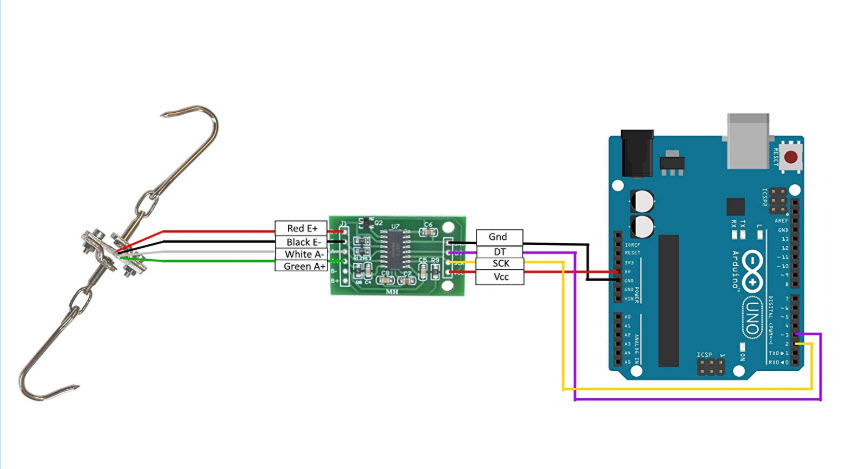
Degraw-provided hookup diagram
After a bit more research, I found a nice HX711 library by bogde and some example programs, and got the whole thing to work using an Arduino Mega 2560. Once I got a program running with some preliminary (but believable) results, I started thinking about how I was going to manage the physical aspects of hooking this assemblage to the rowing machine and recording dynamic tension. I couldn’t really just let the HX711 board hang by the strain gauge wires while connected with jumpers to the Mega board, as the #28 strain gauge leads would surely break. So, I came up with the idea of somehow attaching the HX711 board and a small microcontroller to the load cell assembly, and then connecting the whole thing to my laptop with a USB cable. Hopefully the USB cable would be long enough to allow full extension of the rowing machine strap so I could collect full rowing cycle data.
After some digging around in my parts cabinets, I came up with two candidates for the ‘small microcontroller’ part of the plan; a 3.3V Teensy 3.2, and a 5V/16MHz Sparkfun Pro Micro. I tried the Pro Micro at first, and almost immediately went down the rabbit hole (my term for getting lost in some technical wonderland without a clue how to get back) trying to figure out how to program the device – a challenge due to the way it handles com ports through the USB connector (it actually implements two different ones, depending on whether the boot loader or the user firmware is running – yowie!). After climbing my way out of the rabbit hole, I decided to try the Teensy 3.2 instead, as I familiar with it from several other projects. With the Teensy, I got a test program running and started taking data with known weights attached to the load cell. The way I did this was to suspend a plastic bucket from the load cell, and poured water into the bucket one liter (1Kg) at a time while recording data. This was successful because I got good data, but unsuccessful because the data didn’t make much sense, as shown in the plot below
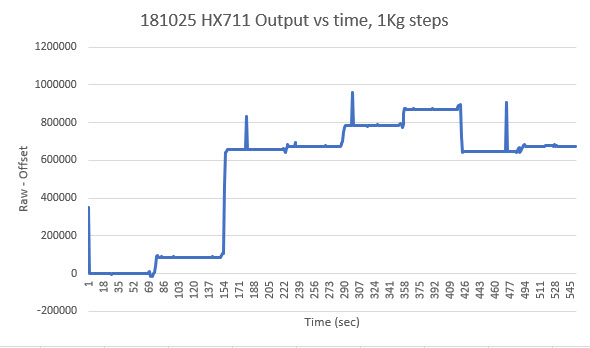
Results of pouring 1L (1Kg) water at a time into bucket suspended from load cell, using a 3.3VTeensy 3.2
As can be seen, the data was anything but the stairstep function I was expecting to see. At this point I wasn’t sure if I had a hardware problem or a software problem, or something else entirely, so I sent an email to Degraw Product support with the above plot attached, asking if they had any insight into the problem. Amazingly, they replied almost immediately, and offered to send me another load cell unit gratis so I could eliminate their hardware as the cause of the problem. Although I was quite pleased with their offer of support, I thought maybe the 3.3V supply of the Teensy 3.2 might be causing the non-linearity (the HX711 advertises 2.7-5V operation but the lower voltage might be causing output linearity problems). So, I tried again with the Sparkfun Pro Micro, and this time I managed to make the programming magic work. Then when I did the same test as above with the 5V Pro Micro instead of the 3.3V Teensy, I got the plot shown below.
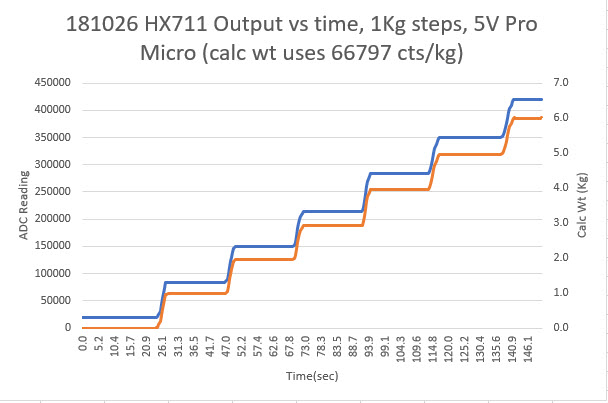
Tension vs time plot created by pouring 1L (1Kg) of water at a time into bucket suspended from load cell, using Sparkfun 5V Pro Micro
So, now that I had the software and microcontroller problems solved, I started working on the mounting issue. After a few minutes in TinkerCad and some quality time with my PowerSpec 3D PRO 3D printer, I had a mounting platform that clipped onto the two vertical rods in the ‘S-shaped’ tension load cell, as shown in the images below.
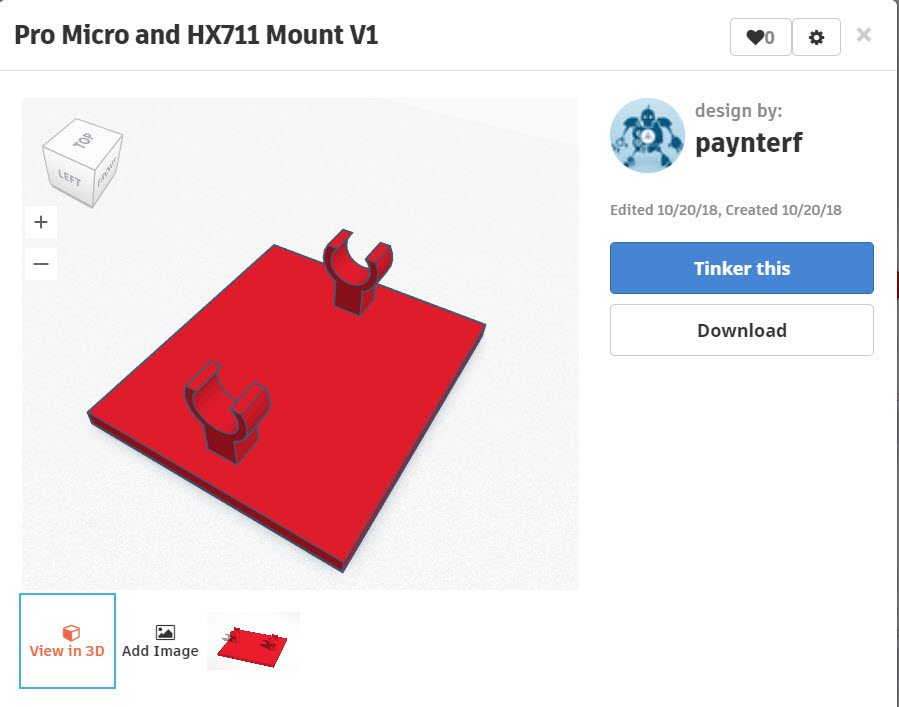

Reverse side of assembly, showing mounting plate clips attached to load cell vertical members

Sparkfun Pro Micro and HX711 board mounted on load cell
After getting all this set up, it was time to take some real data. Since I was still in the ‘no rowing’ zone after my surgery, I enlisted my lovely wife to do the honors while I recorded the data. We have an Avari magnetic rowing machine, which thankfully doesn’t make much noise. I recorded a total of 12 rowing cycles on two different ‘wave’ settings (I’m still not sure what the different ‘wave’ settings mean) at the lowest tension level, with the results shown below
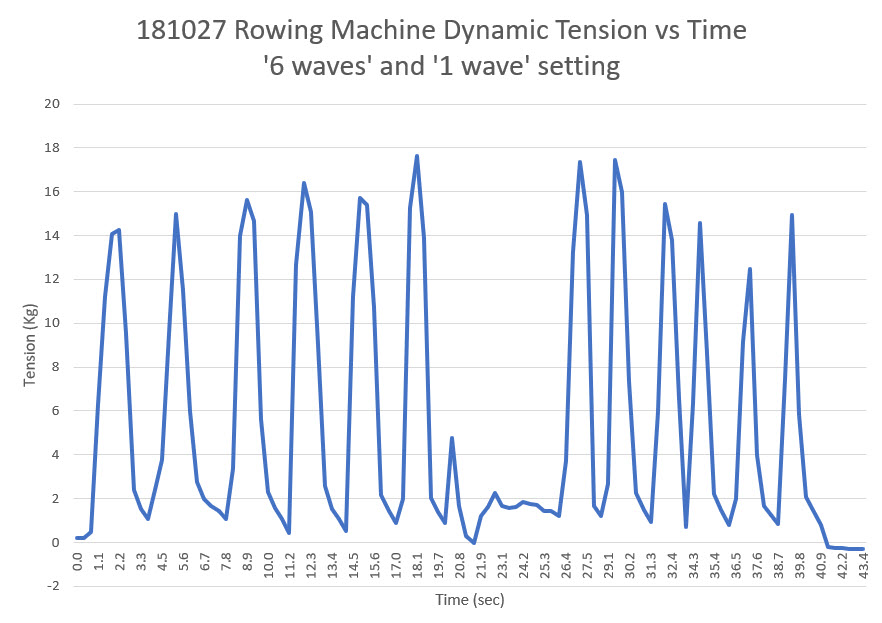
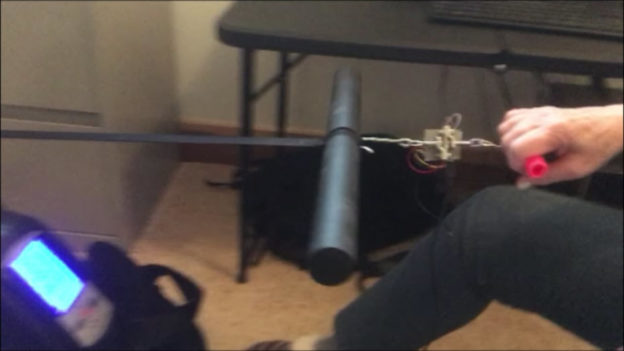
As shown in the above plot, the peak tension reading was around 18Kg (about 40 lbs). I’ve included a short video of the test below.
Pingback: Digital Tension Scale, Part II - Paynter's Palace
This is exactly what I’ve been looking for. I appreciate what you’ve explained. As someone brand new to this world of arduino, load cells, etc, I’d really appreciate if you would list exactly what products and specifications, software, etc you would recommend for the same or a similar test. You’ve listed most of not all in the post, but wanted to be sure that I had exactly what I need the first time and I would find that simply laid out plan very helpful.
Thanks!
Kris,
Nice to know my article is helping. Is there anything specifically that you aren’t sure of? All you really need in the way of electronics hardware is any Arduino-style microcontroller (Uno, Mega, Teensy 3.x, etc), the load cell/dual hook assembly, and a PC to compile the program, and bogle’s library as described. If you get the parts, I’ll be happy to share what code I have. I’m working on some enhancements to the project, but that will be the subject of a later post ;-).
Frank
Pingback: WallE2 Robot in Arduino #include file hell - Paynter's Palace